
Your First Call with Data
Learn how to build your first Callr Actions scenario and receive call metadata on your local machine using ngrok.
Pre-requisites
- A Callr Account. You can request one here.
- ngrok installed on your machine.
- A working development environment (we'll provide examples in Python, PHP, Node and Go).
What is ngrok?It's a tool that exposes your local server to the internet via a secure, temporary URL.
Using Windows?We recommend WSL (Windows Subsystem for Linux) for the best experience.
Step 1 – Create a local server
Run a lightweight HTTP server that prints the data it receives. Below are examples in multiple languages — choose the one that matches your environment.
<?php
// run with php -S localhost:8888 server.php

header('Content-Type: application/json');

$data = file_get_contents('php://input');

if (!empty($data)) {
    // pretty print the json data
    error_log(json_encode(json_decode($data), JSON_PRETTY_PRINT));
} else {
    error_log('No data received');
}

// JSON response
echo json_encode(['success' => true]);
# server.py
# Run with: python server.py
from http.server import BaseHTTPRequestHandler, HTTPServer
import json
class SimpleHandler(BaseHTTPRequestHandler):
def do_POST(self):
content_length = int(self.headers.get('Content-Length', 0))
body = self.rfile.read(content_length)
try:
data = json.loads(body)
pretty = json.dumps(data, indent=2)
print(pretty)
except json.JSONDecodeError:
print("Invalid JSON received")
self.send_response(200)
self.send_header('Content-Type', 'application/json')
self.end_headers()
self.wfile.write(b'{"success": true}')
def log_message(self, format, *args):
return # Silence default logging
if __name__ == '__main__':
port = 8888
print(f"Listening on http://localhost:{port}")
server = HTTPServer(('0.0.0.0', port), SimpleHandler)
server.serve_forever()// Run with: node server.js
const http = require('http');
const server = http.createServer((req, res) => {
if (req.method === 'POST') {
let body = '';
req.on('data', chunk => { body += chunk; });
req.on('end', () => {
try {
const json = JSON.parse(body);
console.log(JSON.stringify(json, null, 2));
} catch (e) {
console.error('Invalid JSON');
}
res.writeHead(200, { 'Content-Type': 'application/json' });
res.end(JSON.stringify({ success: true }));
});
} else {
res.writeHead(405);
res.end('Method not allowed');
}
});
server.listen(8888, () => {
console.log('Server listening on http://localhost:8888');
});// Run with: go run main.go
package main
import (
"encoding/json"
"fmt"
"io"
"log"
"net/http"
)
func handler(w http.ResponseWriter, r *http.Request) {
if r.Method != http.MethodPost {
http.Error(w, "Only POST allowed", http.StatusMethodNotAllowed)
return
}
body, err := io.ReadAll(r.Body)
if err != nil {
log.Println("Error reading body:", err)
return
}
var payload map[string]any
if err := json.Unmarshal(body, &payload); err != nil {
log.Println("Invalid JSON:", err)
} else {
pretty, _ := json.MarshalIndent(payload, "", " ")
fmt.Println(string(pretty))
}
w.Header().Set("Content-Type", "application/json")
w.Write([]byte(`{"success": true}`))
}
func main() {
http.HandleFunc("/", handler)
fmt.Println("Listening on http://localhost:8888")
log.Fatal(http.ListenAndServe(":8888", nil))
}Step 2 – Start Your Server and Tunnel with ngrok
In two terminals:
# Terminal 1
php -S localhost:8888 server.php

# Terminal 2
ngrok http 8888
You’ll see output like this:
Session Status  online
[...]
Web Interface   http://127.0.0.1:4040
Forwarding      https://7ca2-[...].ngrok-free.app -> http://localhost:8888
Take note of the Forwarding URL (https://7ca2-[...].ngrok-free.app) - you will use it in your call flow.
TipVisit http://localhost:4040 to inspect live HTTP requests.
Step 3 – Create your first Call Flow
- Go to Callr Actions.
- Click CREATE (top right).
- Choose the Blank template.
Paste the following YAML and replace $url with your ngrok forwarding URL:
description: My first call with Callr

defaults:
  language: en-US

variables:
  $url: https://<your-ngrok-forwarding-url> # replace this

compat:
  version: "2025-09-01"

branches:
  inbound-call:
    actions:
      - action: say@v2
        params:
          what: Welcome to my first call flow!

      - action: say@v2
        params:
          what: I will hangup now!

      - action: hangup@v1

  hangup:
    actions:
      - action: fetch@v2
        params:
          url: ${{ $url }}
          method: POST
          headers:
            content-type: application/json
          body: |
            {
              "run": ${{ JSON.stringify(run) }},
              "call": ${{ JSON.stringify(call) }},
              "scenario": ${{ JSON.stringify(scenario) }}
}Click SAVE or press CTRL+S.
Step 4 – Assign a phone number
- Click the Test tab (on the right sidebar). You will get this screen:
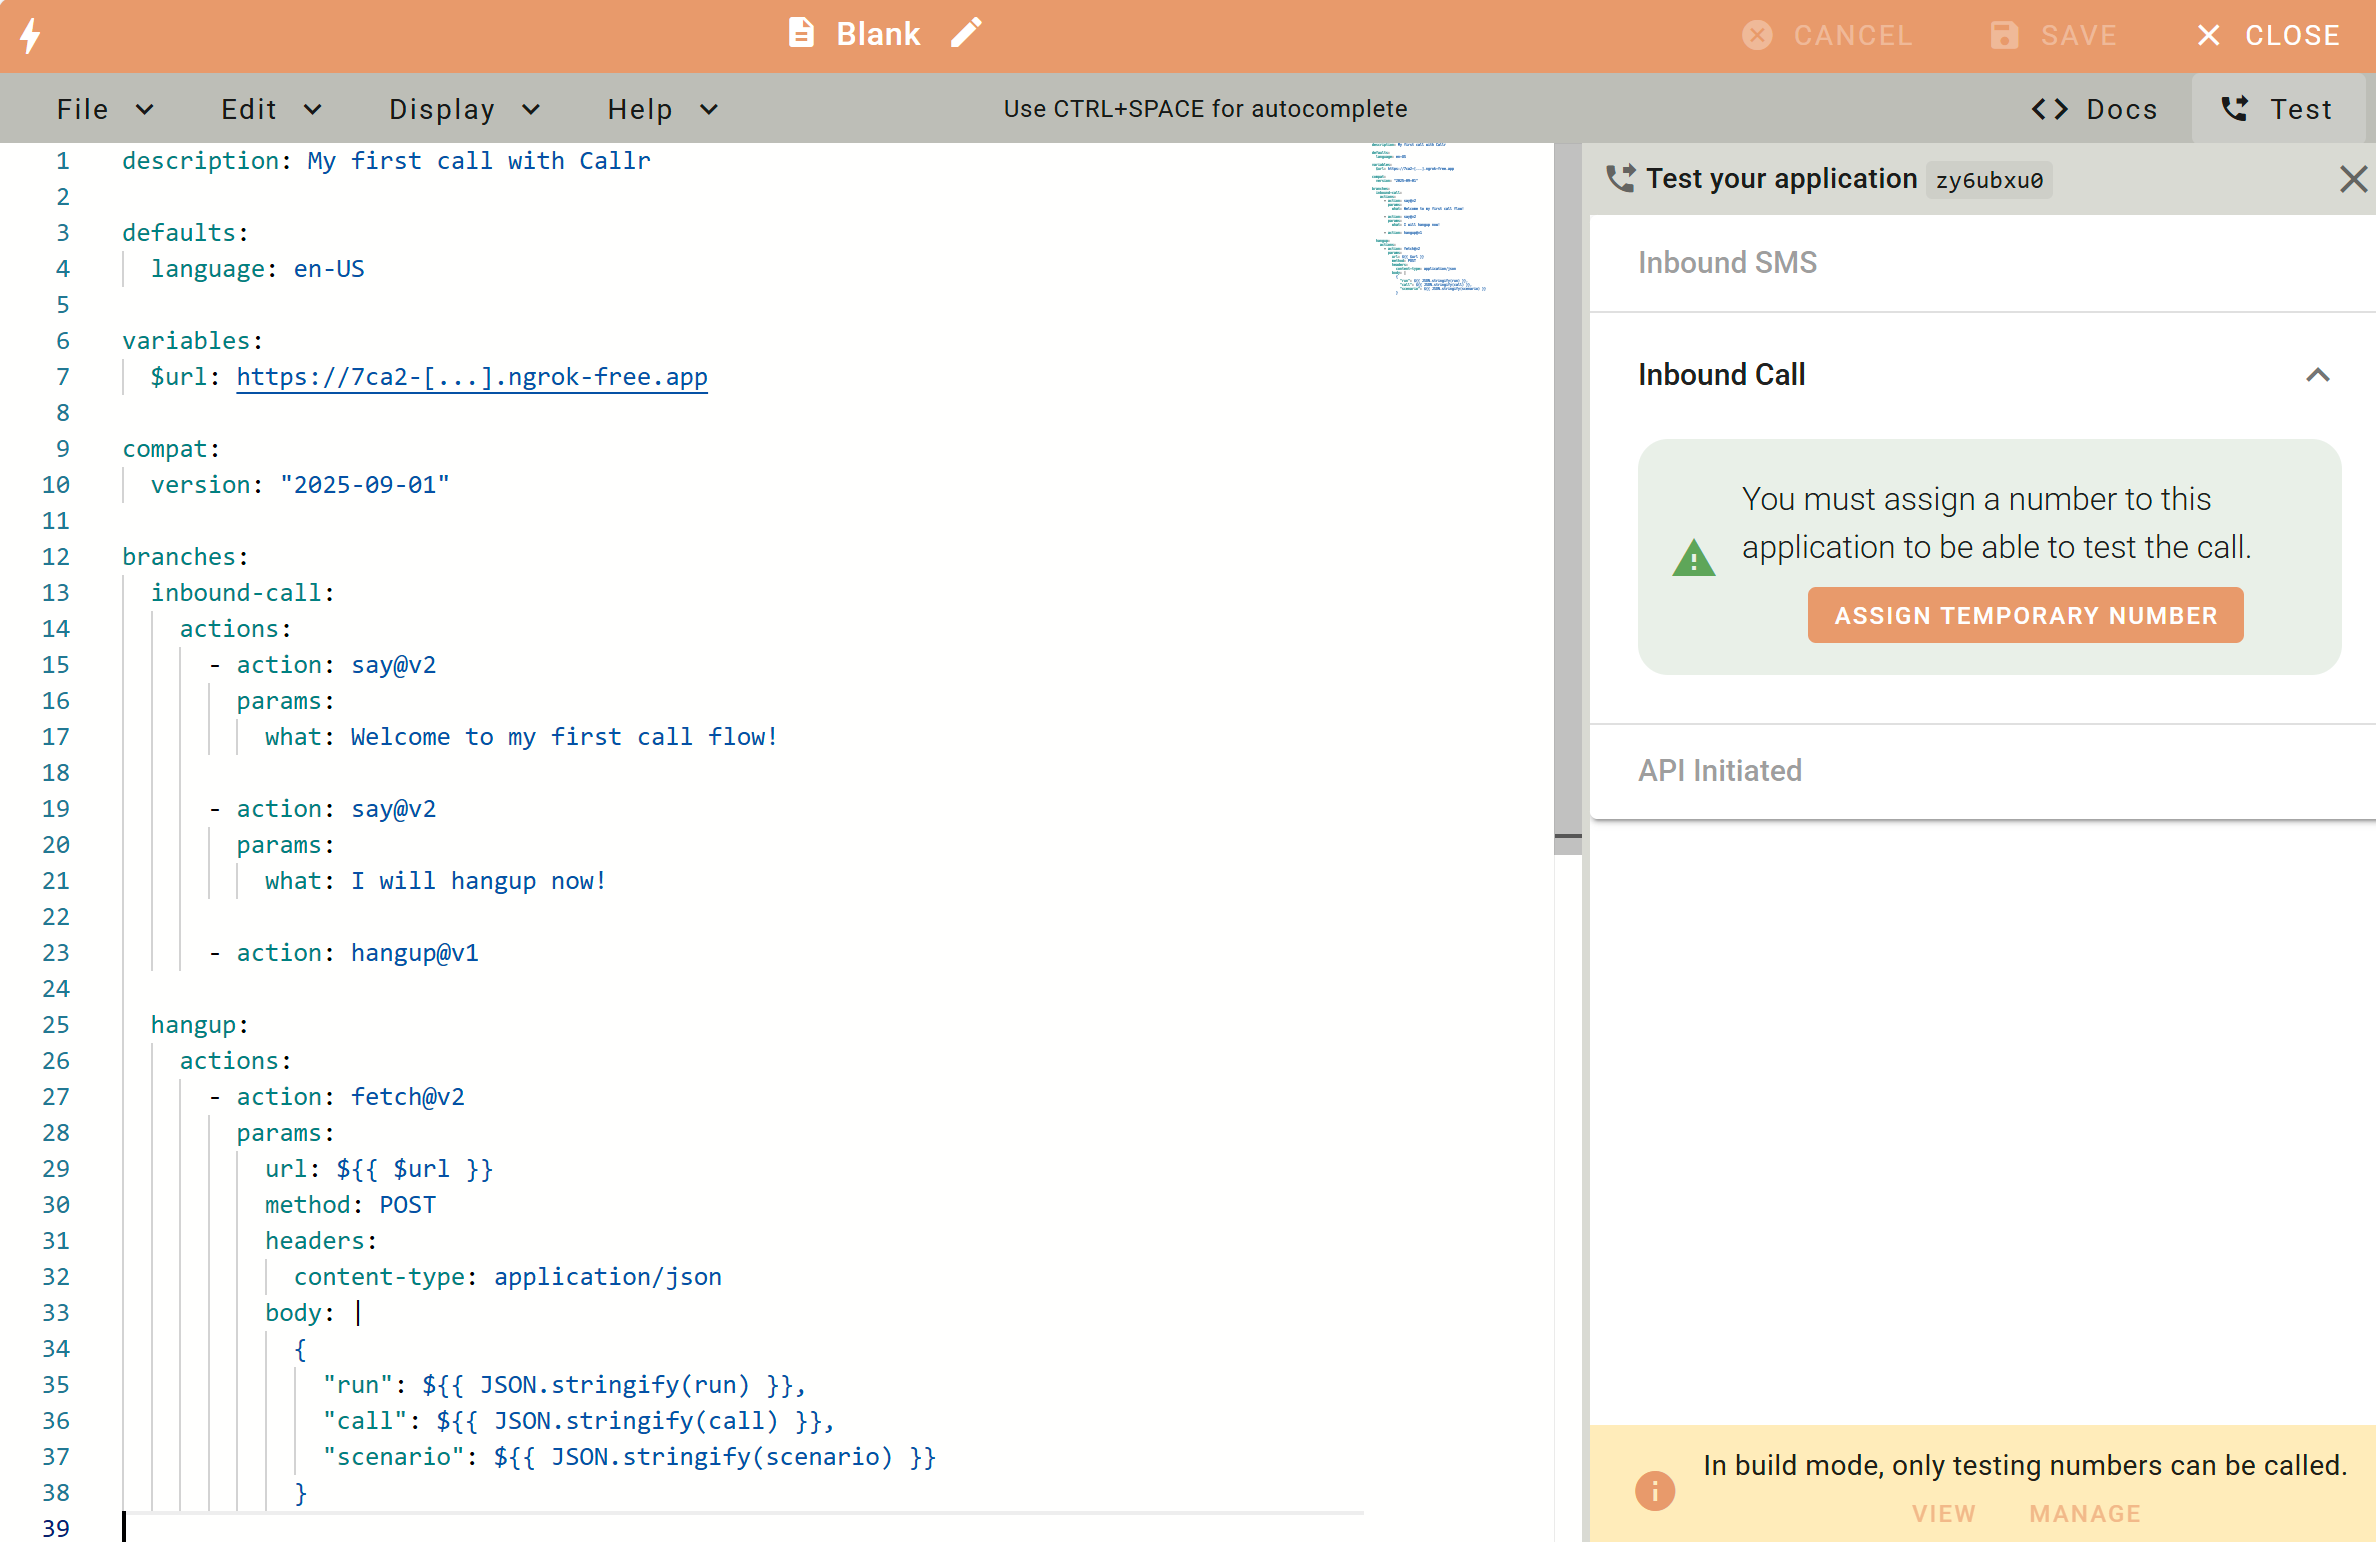
- If you are in Build Mode, click ASSIGN TEMPORARY NUMBER.
- If you are in production: close the editor, assign a phone number to the scenario, and go back to the Test tab.
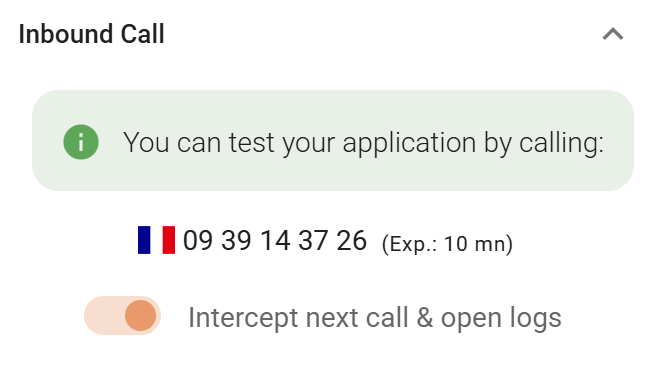
You’ll see a number you can call for testing.
Check Intercept next call & open logs to activate the live debugger.
Step 5 – 📞 Call the phone number
Call the number from your phone.
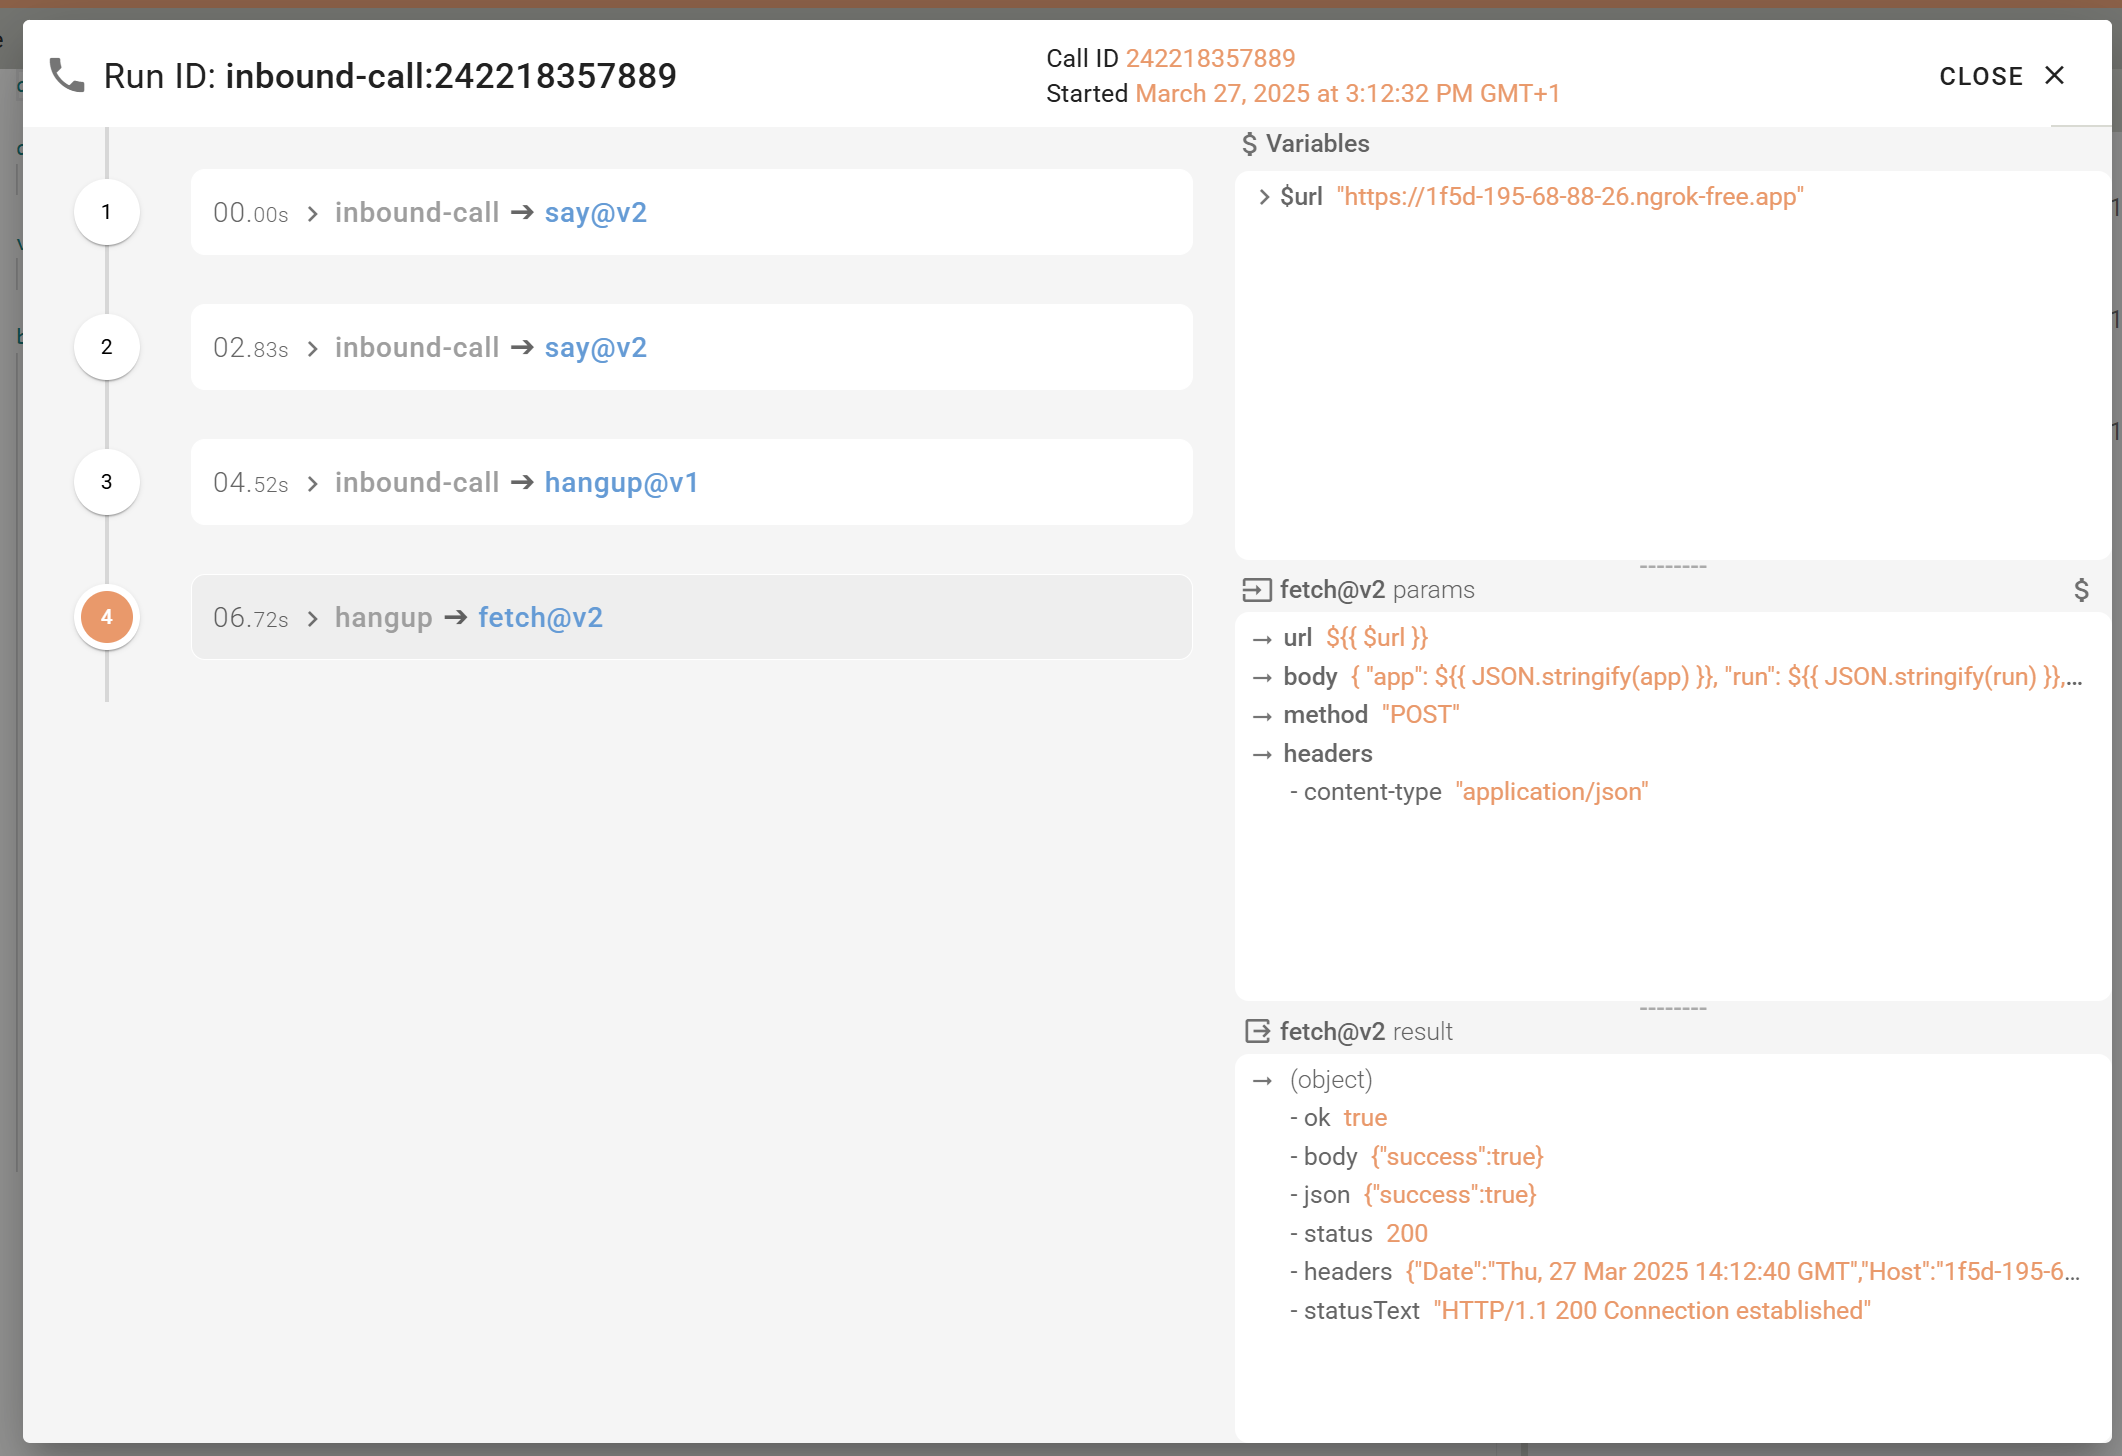
The log window in the editor will display:
- ▶️ Variables available at each step (updated ones shown in bold).
- ▶️ Input parameters to each action.
- ▶️ Output of each action.
Step 6 – View the Metadata
In Terminal 1, you should see a JSON payload like this:
[Thu Mar 27 15:06:09 2025] PHP 8.2.28 Development Server (http://localhost:8888) started
[Thu Mar 27 15:12:39 2025] 127.0.0.1:51676 Accepted
[Thu Mar 27 15:12:40 2025] {
  "run": {
    "id": "inbound-call:242218357889",
    "type": "inbound-call"
  },
  "call": {
    "cdr": {
      "billingCredit": "0.0000",
      "billingDebit": "0.8925",
      "billingDestinationLabel": "FR-GEOGRAPHIC-CLASSIC",
      "billingPaymentType": "prepaid",
      "callee": "+33939143726",
      "callerName": "",
      "callerNumber": "+33639980042",
      "callerRestricted": false,
      "callid": 242218357889,
      "direction": "inbound",
      "durationAnswered": 4,
      "durationBilled": 60,
      "durationTotal": 5,
      "started": "2025-03-29T17:55:57.093Z",
      "answered": "2025-03-29T17:55:58.373Z",
      "ended": "2025-03-29T17:56:01.873Z",
      "hangupCause": 16,
      "hangupSource": "callee",
      "hangupTech": "sip:200",
      "scenarioName": "Blank",
      "scenarioSid": "zy6ubxu0",
      "scenarioTypeName": "Actions",
      "scenarioTypeVersion": "1.0",
      "status": "answered"
    },
    "direction": "inbound",
    "fromCountry": "FR",
    "fromLocation": "France",
    "fromNumber": "+33639980042",
    "fromType": "MOBILE",
    "id": 242359184129,
    "leg": "A",
    "startedAt": "2025-03-29T17:55:57.093Z",
    "toCountry": "FR",
    "toLocation": "France",
    "toNumber": "+33939143726",
    "toType": "VOIP"
  },
  "scenario": {
    "name": "Blank",
    "sid": "zy6ubxu0"
  }
}
[Thu Mar 27 15:12:40 2025] 127.0.0.1:51676 Closing
This matches what you defined in the fetch@v2 action — an object with three keys:
runcallscenario
These are pre-defined variables in Callr Actions.
Updated 4 months ago